About Me
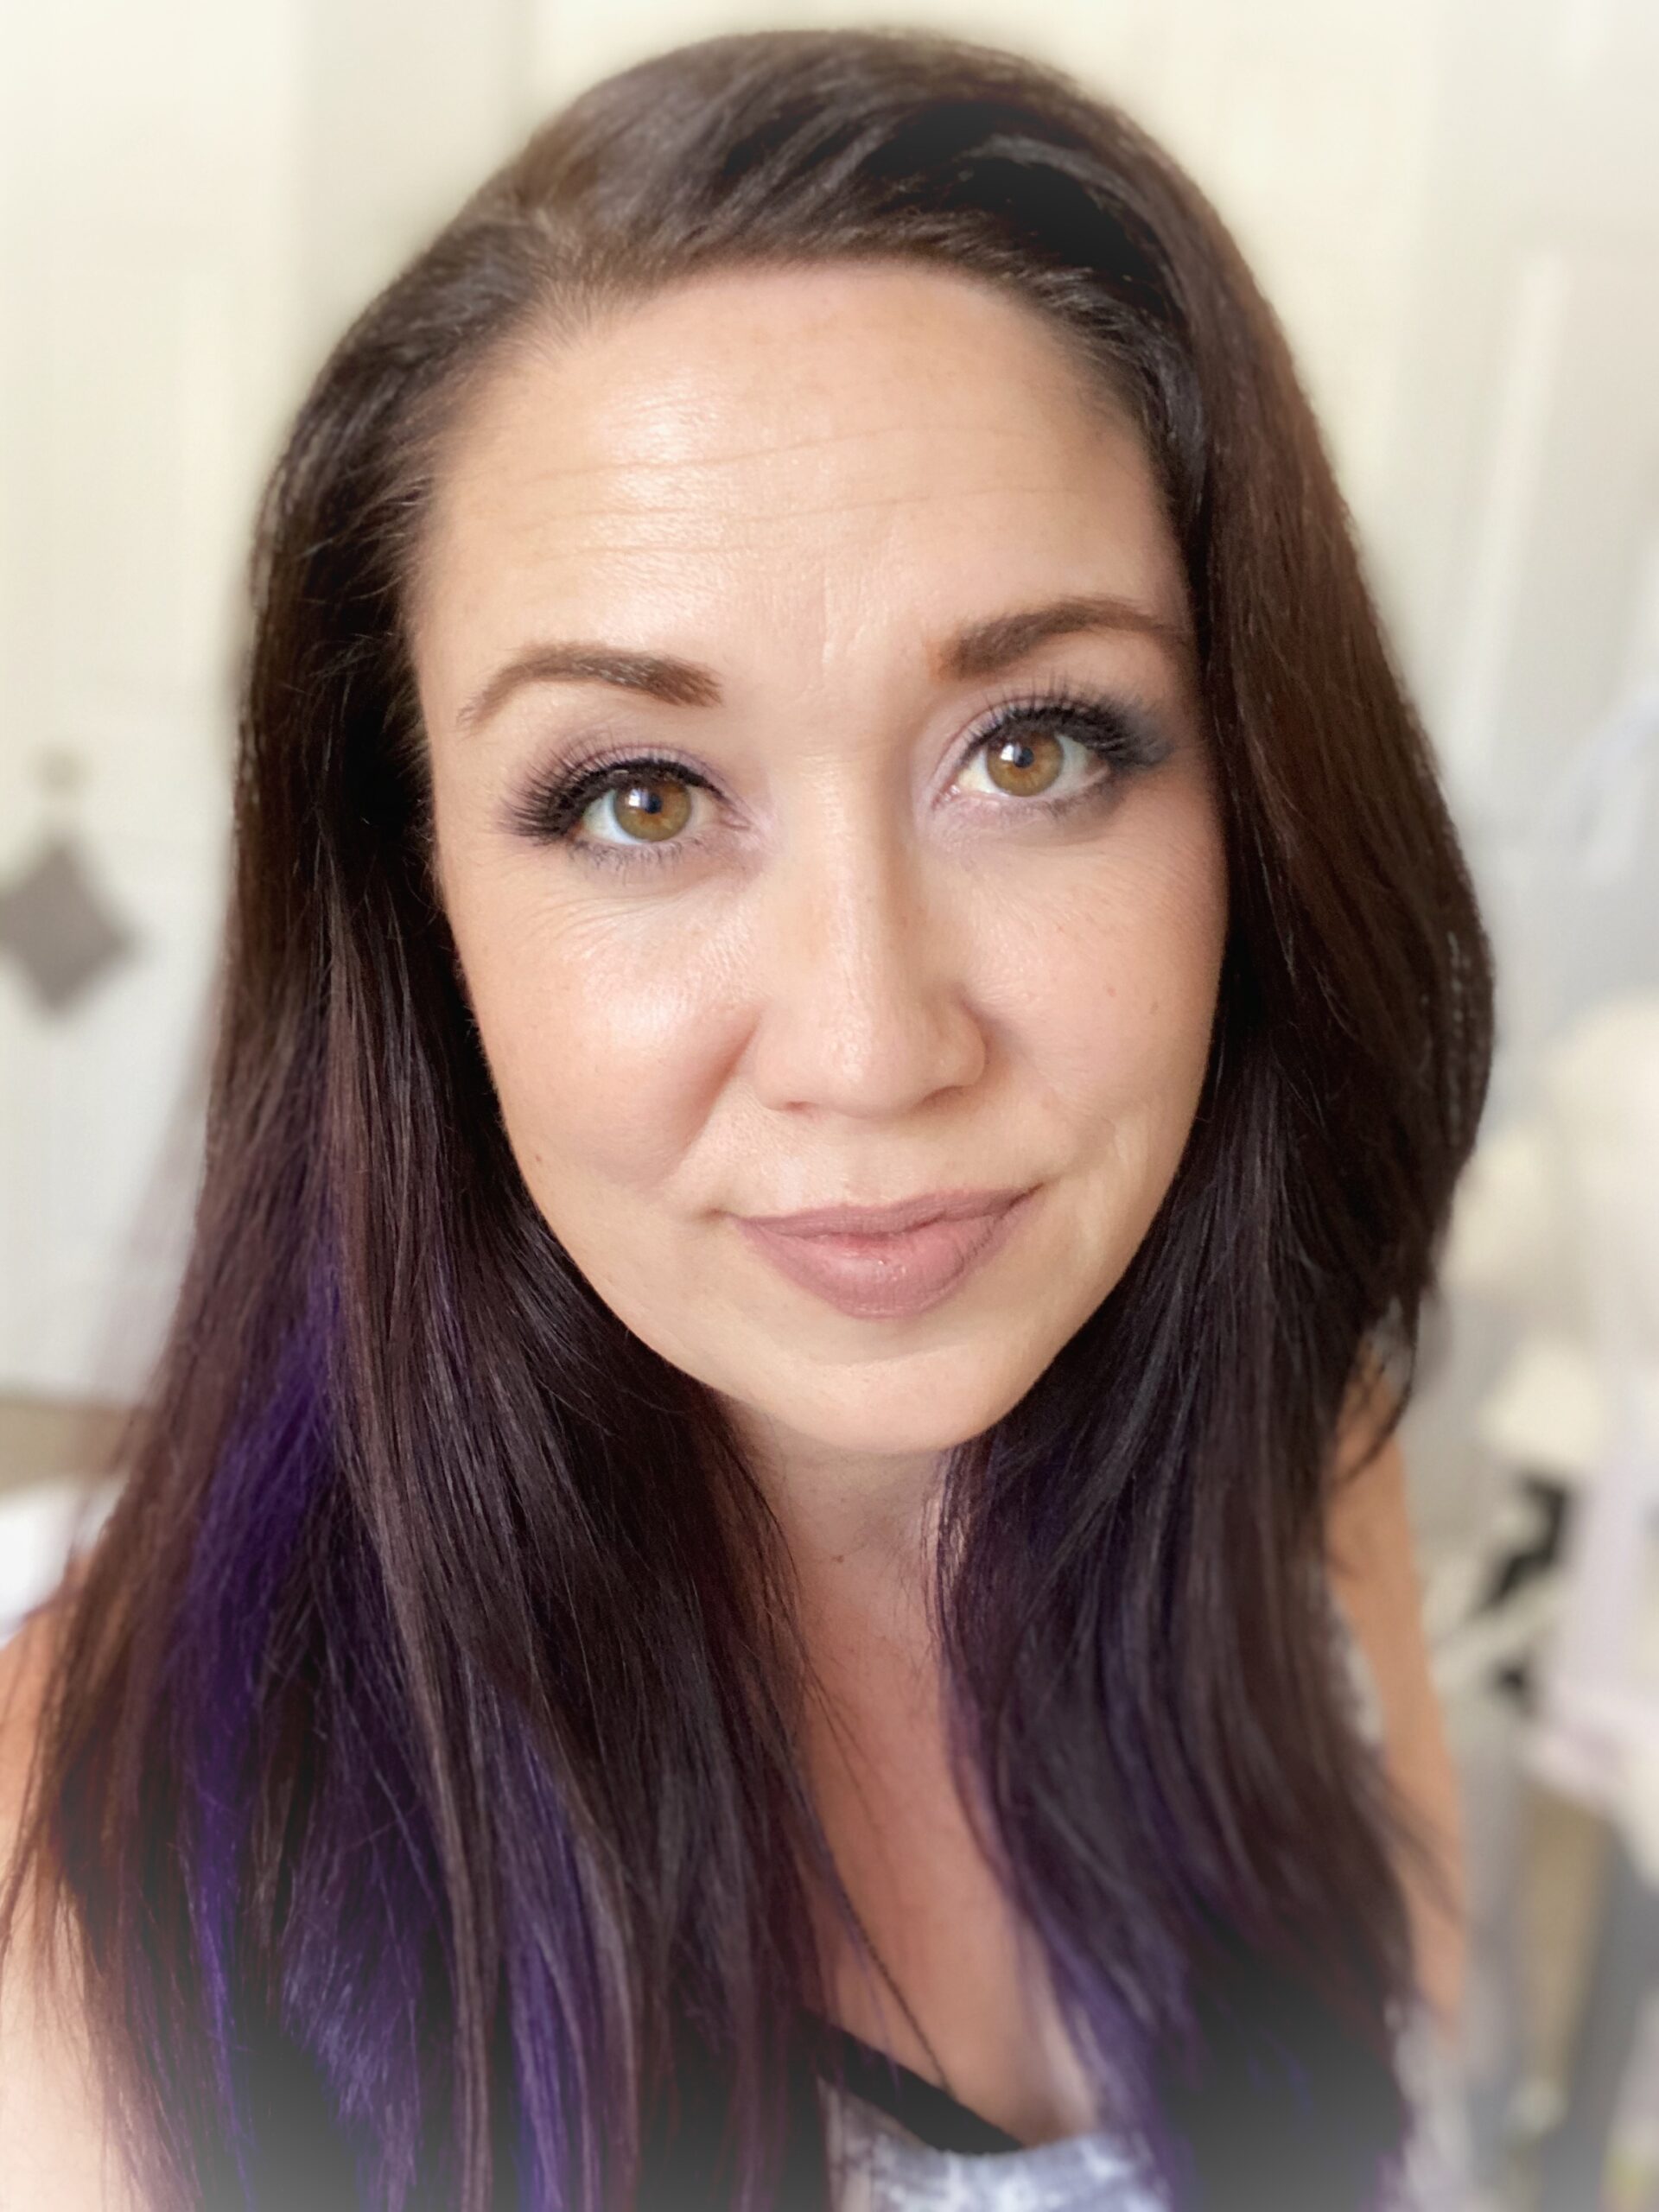
Hi there, I’m Stefanie!
Stefanie, with an “F” not a “PH”. I live in West Bountiful, Utah with my hubby, Darren and 3 pups, Crickytt, Auzzie and Froggy! Darren is my Twin Flame Soulmate and the best thing that has manifested in my life! We were set up on a blind date and our third date was a complete DIY bathroom renovation (I’m talking you could see the pipes in the floor boards where the tub use to be)! We have so many fun, hard, real and beautiful stories to follow. We were married in Laguna Beach, CA where our souls will always be pulled. I am the oldest of 9 kids (8 living) and I don’t know where I would be in life without them!
I have always been attracted to all things magical and have tuned into my intuition to help others. I am a Disney-holic, Crystal Loving, Intuitive, Self- taught Scorpio Artist that Believes in Magic! I have also been recreating the beauty industry as a licensed Hair & Makeup Artist since 2001, with my focus now being Fantasy Hair & Makeup Transformations & Costume/Event Styling.
I have had a longing and connection to Disney since childhood. Originally wanting to be a Disney Animator, I would spend hours drawing and creating Disney characters as a kid. So, now I feel that I am fulfilling that dream in a little different way! I have always done DIY in a Disneyfy (or other fandoms) way. Being born the day before Halloween and love for Tim Burton at a young age only added to my weirdness. My heart is so grateful for all the support I now have, and I hope to create extra magic for others through art, hair, makeup, DIY, healing and much more! My heart & mind have no limits of what imagination can create!
Through my own healing and alignment, I have come to realize I have always had an intuitive empathy. I have loved being able to help others by getting certified as a Reiki Healing Practioner & Yoga Teacher. Using these modalities along with my Artistry to assist with inner guidance & magical inner & outer transformation.
My artistry is not one medium or style. It doesn’t consist of one type of palette or tool…. My artistry originates from the heart and imagination of my childhood self. It is executed with purpose and passion to share my unique thoughts to the world. It is led by the workmanship and unity of mind, body and spirit…. I am surrendering and embracing the way my higher self has repeatedly shown and blessed me to share with the world. Each piece I share with you comes with great intent to bring joy, beauty, connection and magic to those who need! This is my artistry mantra…..
My Latest Posts
DIY Star Wars Loth-Cat Costume Step-by-Step Tutorial
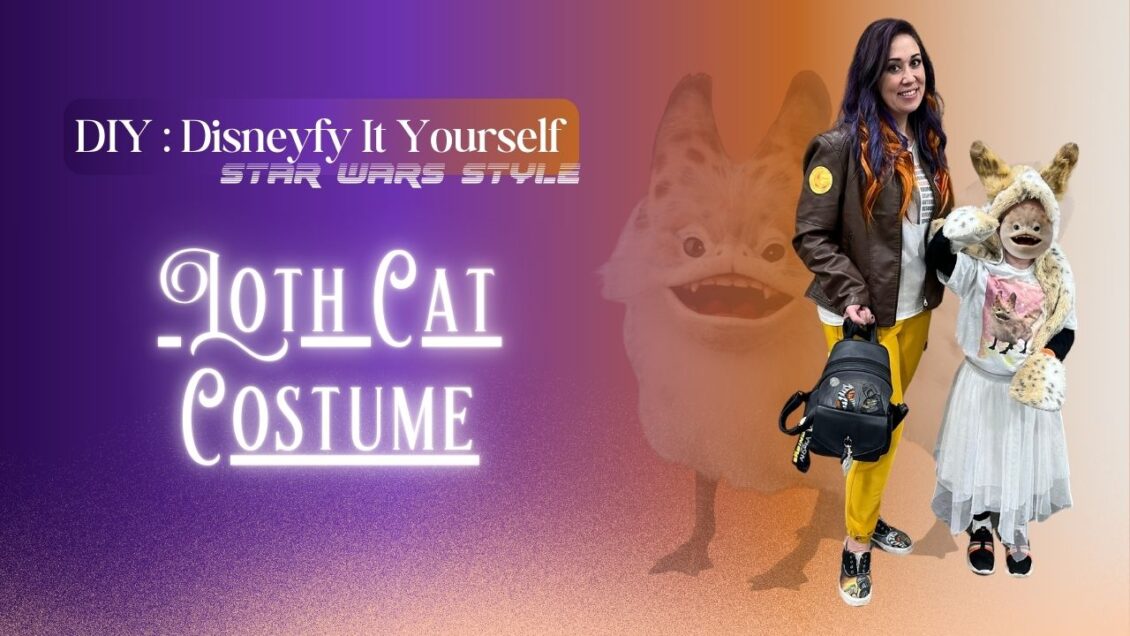
Today’s step-by-step DIY tutorial, we’re going to be creating a Star Wars inspired Loth-Cat Costume. It can be done as cosplay, but more Disneybounding-ish.
This project came about because, as you can see, I’ve done Sabine Wren’s look a few times for Star Wars Nite at Disneyland, and FanX events. When we first saw Sabine Wren in the Star Wars Ahsoka series with her first attire and hairstyle, it was a no-brainer for me to recreate it. It’s become my go-to Star Wars look!
But here’s the fun part—my niece saw the Loth-Cat in Star Wars Rebels & Ahsoka, and instantly thought it was the cutest thing ever. After hearing about the possibility of making a Loth-Cat costume, she was determined, talking about it for months! So, I thought, why not figure out how to make it? My goal was to make a costume that was easy, lightweight, and not too hot—perfect for events like FanX, which can get pretty toasty indoors.
So today, I’m sharing my step-by-step Loth-Cat costume DIY with you. Be sure to check out my Sabine costume tutorial as well (coming soon!), where I’ll also share the custom patches I designed.
Watch the Full Tutorial on YouTube:
Prefer to follow along with a video? Watch the step-by-step process on my YouTube channel here: Watch the DIY Loth-Cat Costume Tutorial on YouTube!
_____________________________________________________________
Materials You’ll Need:
- Reference picture of a Loth-Cat
- Glue Gun & Glue Sticks
- 9 Gauge Wire
- Animal Hooded Scarf
- Paint & Stiff Brush
- Comb (to brush it out)
- Fishing Line
- Curved Needle
- White Fur (1/3 yard)
- Tan/Beige Fur (9″ x 12″)
- Scissors
- Pliers/Wire Cutter
- Razor Blade/ Utility Knife
📌 Disclosure: As an Amazon Associate, I earn from qualifying purchases through the affiliate links above. This helps support my blog and channel at no extra cost to you.
_____________________________________________________________
Let’s Get Started!
- Shaping the Ears:
First, eyeball the initial height for the Loth-Cat ears. Once you’re happy with one, use it as a template for the second ear. This makes the process easier and quicker. Shape your wire to look like the ears, then glue your tan fur into place, wrapping it around the ear tips. Remember to use a razor blade to score the fur so the edges stay natural! - Sewing the Ears:
I used doubled-up fishing line to sew the wire to the fur hood, adjusting as I went along. I pulled the hood ears through the wire and fabric. Sew it tightly for stability, and fold the hood ears over the wire to add support for them to stand up . - Adding Paint to Ear Tips:
I used watered-down brown paint for the Loth-Cat’s ear tips. Be sure to paint with the grain of the fur. Feel free to go darker than I did! I would recommend adding black to the brown for more contrast. - Adding the Second Layer of FurNow, I’m going to place the other piece of fur that I had precut. This piece is designed to overlap the painted portion, allowing the natural fur to blend seamlessly into the painted areas. Once I have everything in position, I sew the front piece securely to the base of the hood, ensuring a snug fit. For the top part, I used hot glue, which worked out great. I made a few adjustments along the way and decided to add a bit more fur where needed for a fuller look.
- Painting Spots: Now it’s time for Loth-Cat’s signature spots. I use a dabbing technique to paint the spots onto the fur. Each Loth-Cat has unique spots, so don’t worry about perfection.
- Creating the Tail:
Using a 1/3 yard of fabric, I folded the top in a triangular fashion sewing it in place, while leaving an opening to stuff it. Then turning it inside out to hide the seam, I sewed along the length of the tail. Once it was sewn, turning it back to right-side out. Being that the Loth-Cat tail is full at the end, I sew it along the width. I then painted the stripes, again going with he grain of the fur with short brush strokes, to work the paint into the fur. - Brush Out, Fluffing & Stuffing
After everything dried, I used a wire brush to fluff out the fur, going with the grain of the fur.I then used paper towels to stuff the tail. (Batting works too, but I improvised here!) - Final Touches:We paired the costume with a cute white skirt and black leggings & long-sleeve shirt under a shirt I did with the Loth Cat . My niece loved it, and everyone at FanX & Mouse-Con adored her Loth-Cat! She very much became the loth cat with her Meow responses and pawing.
What do you all think? If you’re going to try it yourself, let me know in the comments below!
- Loth Cat Found Another
- Ezra
- Ahsoka & Hera
- MandoSnow
- Dark JarJar
- Tech
_____________________________________________________________
Don’t Forget to Subscribe!
Follow along with the video tutorial here: Watch the DIY Loth-Cat Costume Tutorial on YouTube! Don’t forget to subscribe and hit the notification bell for more Star Wars & Disney DIYs. If you loved this project, share it with your fellow Star Wars fans! Also, be on the look out the full Sabine look I created for some cosplay/disneybound inspiration.
Your support helps me keep making magical content for you all, and is so appreciate!
Find Me Online:
🌐 Website: https://magicalartistry.com
📷 Instagram: https://www.instagram.com/stefaniesmagicalartistry/
🎥 TikTok: @magicalartistry
📌 Pinterest: https://pin.it/WmLTRFxxW
Shop My Favorite Products:
Looking for more magical crafting supplies? Check out my favorite products here: https://magicalartistry.com/my-favorite-magical-recommendations/
Disney-Inspired DIY Macrame Mickey & Minnie Ghosts | Disneyfy It Yourself (DIY) Halloween Decor
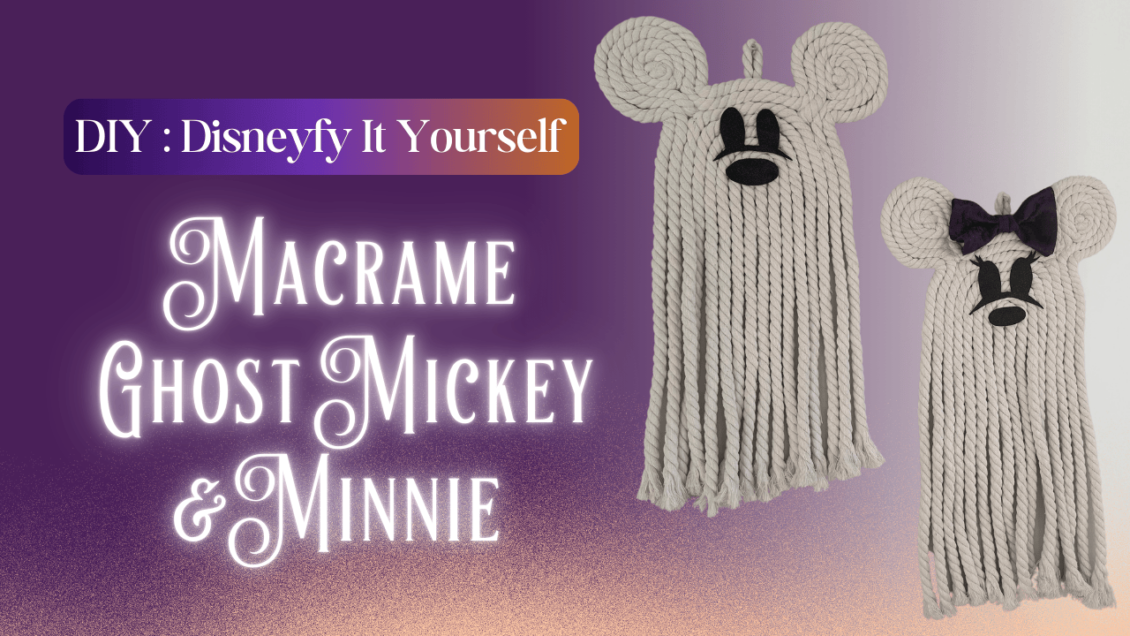
Ready to add some spooky Disney magic to your Halloween decor? 🕸️👻 In this Disneyfy It Yourself tutorial, I’ll show you how to make adorable Macrame Mickey & Minnie Ghosts! These fun, easy-to-make crafts are perfect for adding a touch of Disney charm to your home. Whether you’re a seasoned crafter or a beginner, this simple DIY project will have you creating hauntingly cute ghost decorations in no time. Perfect for Halloween lovers and Disney fans alike, let’s get crafting! 🎃👻
Watch the Full Tutorial on YouTube:
Prefer to follow along with a video? Watch the step-by-step process on my YouTube channel!
Click here to watch the DIY Macrame Mickey & Minnie Ghosts video
Materials Used:
To create your Mickey & Minnie Macrame Ghosts, you’ll need:
- Macrame Cord – 10 mm thick
- Glitter Foam/ Felt
- White Foam Board
- Crafting Scissors
- Sewing Scissors
- Hot Glue Gun
- Hot Glue Gun Sticks
- Razor Blade
- Pencil
- 8 ¼ inch plate and 4-inch coasters
📌 Disclosure: As an Amazon Associate, I earn from qualifying purchases through the affiliate links above. This helps support my blog and channel at no extra cost to you.
Step-by-Step Tutorial:
- Prepare Your Tools & Materials: Gather your glue gun, crafting scissors, sharp sewing scissors, a razor blade, and a pencil. For tracing the shapes, I used an 8 ¼ inch plate and 4-inch coasters. You can adjust the sizes to your preference, but these worked perfectly for my design. I used 10 mm macrame rope, but you can adjust the size depending on the size of your project.
- Trace Your Template: Using a white foam board, trace the template for Mickey & Minnie’s heads. I like to place the template near the edges of the foam board to minimize waste, leaving space for other projects. You only need to trace a half-circle for this, as we are focusing on the head and ears.
- Cut the Foam Board: Using a razor blade, score the foam board along your traced lines. If the cut doesn’t go all the way through, you can use scissors to finish cutting the shape out. It helps to cut the foam board down into smaller sections for easier handling.
- Make Additional Templates: If you plan to make multiple ghosts, I recommend creating a paper template from a paper bag or other material to reuse. For this project, I traced another foam board template for Minnie.
- Attach the Macrame Cord: Begin by gluing the macrame cord around the outside edge of your foam cutout. As you work, twist the rope to prevent it from unraveling, making sure to fully cover the outer edge. Work around Mickey’s ears until you’ve completed a full loop.
- Create the Ears: After closing off the main shape, add a generous amount of glue to where the ears will be. Twist the rope and press it into the glue, forming a circle. Continue circling the cord, like forming a cinnamon roll, until the ear is complete. Add extra glue where needed to secure it in place.
- Shaping & Securing: As you work, shape the macrame cord around the foam form to ensure everything lines up smoothly. If you spot any gaps or loose ends, use a skewer stick or cuticle stick to push fibers back into place with a dab of glue.
- Create Mickey & Minnie’s Faces: Draw a simple face template on the foam board using a pencil. I debated whether to include a smile, but ultimately decided to go for it. You can design the face however you like—just make sure it looks how you envision Mickey or Minnie’s spooky-yet-cute face.
- Add Minnie’s Bow: For Minnie’s bow, I made my own using a fabric that I loved, but you can use any fabric or material you prefer. Simply attach the bow with hot glue between Minnie’s ears to complete her look.
- Final Touches: Once everything is glued in place, add a small loop to the back of your ghost using leftover macrame cord for easy hanging. Secure the loop with extra glue and wrap the ends for reinforcement. If you want, you can also add extra details like Minnie’s eyelashes or any additional embellishments you prefer.
Show Off Your DIY Halloween Decor:
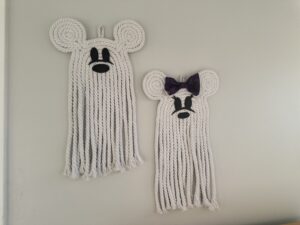 Here’s the final product! I’m thrilled with how these Macrame Mickey & Minnie Ghosts turned out, and I hope you have just as much fun making them. If you give this DIY a try, make sure to tag me on Instagram @stefaniesmagicalartistry so I can see your creations! Should I add a smile to Mickey? Let me know what you think in the comments below! 🎃
Don’t Forget to Subscribe!
👻 Be sure to Like, Subscribe, and Leave a Comment so you don’t miss out on future Disney-inspired DIYs, transformations, and fandom lifestyle videos! Your support helps me keep making magical content for you all.
Find Me Online:
🌐 Website: https://magicalartistry.com
📷 Instagram: https://www.instagram.com/stefaniesmagicalartistry/
🎥 TikTok: @magicalartistry
📌 Pinterest: https://pin.it/WmLTRFxxW
Shop My Favorite Products:
Looking for more magical crafting supplies? Check out my favorite products here: https://magicalartistry.com/my-favorite-magical-recommendations/
Oceanic Tresses: Mermaid Hair Essential Products
Mermaids have long been symbols of beauty and mystery, with their flowing locks and ethereal presence captivating imaginations for centuries. If you’ve ever dreamed of channeling the enchanting allure of these mythical creatures, you’re in luck! In this guide, we’ll explore the products to help achieve stunning mermaid hair that will make you feel like you’ve emerged from the depths of the ocean.
**Disclaimer: This post contains affiliate links, which means I may earn a small commission if you make a purchase through these links. This comes at no extra cost to you and helps support the continued creation of content. Thank you for your support!**
Hair Maintenance:
- Hair Care:
I highly recommend the Redken Extreme Length hair care products for all Mermaids! Redken Extreme Length Shampoo infused with Biotin is for strengthening damaged hair to grow longer and stronger. Extreme Length Shampoo helps prevent breakage and promotes hair growth. It smells absolutely wonderful also! Products available include: Shampoo, Conditioner, Mask (use as needed), & Leav-In Conditioner!
– Affiliate Link 1: Redken Extreme Length – https://amzn.to/3Qd3Rtn
- Protecting Hair Color :
– Product: Shield your hair when doing any type of underwater and sun exposure. When swimming it is always recommended to apply conditioner to hair and leave it in while swimming.
– Affiliate Link 1: Redken Acidic Color Gloss Treatment –
– Affiliate Link 2: Color Edge Shine Cream | Detangler –
- Protecting Hair Extras:
Styling Tools::
- Hot Tools:
– Affiliate Link 1: Wavytalk 5 in 1 Curling Iron,Curling Wand Set –
– Affiliate Link 2: Hot Tools Stylers –
– Affiliate Link 3: Hot Tools 3 Barrel Hair Waver
- Heatless Tools:
– Heatless curls can help with durability of the curls and long term maintenance of hair.
– Affiliate Link 1: Hair Rollers for Heatless Overnight Curls–
– Affiliate Link 2: Eight Claw Design Heatless Curler –
- Teasing Comb:
– Affiliate Link 1: Black Diamond Comb –
Hair Pieces:
- Synthetic Hair Extensions
Synthetic hair will need low-heat styling before application and blend with natural hair
– Affiliate Link 1: Ponytail Extension, 26 inch –
– Affiliate Link 2: Synthetic Hair 20 Inch Hidden Wire Headband–
– Affiliate Link 3: Braid Headbands-
– Affiliate Link 4: Braid Ponytail Extension –
– Affiliate Link 5: NAYOO Hair Extensions –
– Affiliate Link 6: Clip in Hair Extensions Synthetic Hair –
- Human Hair Extensions:
Human Hair Extensions can be styled with your natural hair and will need thermal product care.
– Affiliate Link 1: 22 Inch Human Hair Clip-In Extensions –
– Affiliate Link 2:Invisible Line Hair Extensions, 22 Inch –
- Wigs:
Wigs are a great way to create big transformations! Lace front wigs give a natural and soft hairline and are generally a better quality. Non-lace front are a cheaper option and have a very harsh hair line which can be hard to work with when styling.
– Affiliate Link 1: ImStyle Lace Front –
– Affiliate Link 2: Lushy Lace Front Wig –
- Glitz:
– Affiliate Link 1: Hair Tinsel Clip-In Pack –
– Affiliate Link 2: Powder Puffer Bottle For Glitter Spray –
Styling Products:
- Volumizing Powder:
– Product: Volumizing powder not only volumizes the base of the hair but can assist in adding texture for better hold when used with a thermal spray. Powder is also used in styling wigs and assisting in making synthetic shine look more natural.
– Affiliate Link 1:SexyHair Big Powder Play –
– Affiliate Link 2: got2b Powder’ful Vol Style Powder–
– Affiliate Link 2: got2b Vol Style Powder Spray–
- Thermal Protectant Spray:
– Product:
– Affiliate Link 1: AG Care Curl Spray –
– Affiliate Link 2: Redken Thermal Spray –
- Holding & Finishing :
– Affiliate Link 1: Got2b Ultra Glued Invincible Styling Hair Gel
– Affiliate Link 2: Joico Power (Hair) Spray –
– Affiliate Link 3: Redken Shine Flash Glistening Mist –
Ready to embark on your mermaid hair journey? I hope this helps while you indulge in some underwater-inspired glam.

